


Let’s continue with Part-2 in Series of Ionic framework tutorials for Mobile App Development. In Part-1 of this Ionic Tutorial Series, we covered topics majorly related to beginner level including Ionic Framework Introduction, Installation and Setup Development Environment for Ionic Framework, explaining life-cycle of an Ionic Application, how navigation works and support for Caching View in Ionic framework. If you have landed to this page directly or not clear about above mentioned concepts, we’ll strongly recommend to go through Part-1 and read these for better understanding.
Also, we have provided a separate Ionic Tutorial for Building a Hybrid Mobile Application Development using Ionic and Cordova; we will refer that already developed application throughout this article series to add more value by implementing more features.
- Build your first Hybrid Mobile App using Ionic and Cordova
- Ionic Tutorial for Mobile App Development - Part 1

Understanding Step by Step Ionic Mobile App Development
We are going to cover following topics in this Ionic Tutorial:
- How to publish an Ionic Mobile Application?
- Developing a User-defined Pipe in Ionic App
- How to Make an HTTP request from an Ionic Application?
- Setup a Test Framework for Ionic application
- How to build a Mobile App for different Platform from Ionic App?
How to publish an Ionic Mobile Application?
Follow the steps to publish an Ionic Mobile App:
- Create an Ionic App
Follow the steps described here in “Your first Hybrid Mobile App development using Ionic” and run the new ionic application in browser. - Release a build of Ionic App
Once you have your Ionic App ready, it needs to release build of the app for each targeted platform. Need to run the following command:
Build for Android with following command:1ionic plugin rm cordova-plugin-console
Need to generate our private key using the keytool command:1cordova build --release android
Sign the jar with following command:1keytool -genkey -v -keystore my-release-key.keystore -alias alias_name -keyalg RSA -keysize 2048 -validity 10000
Now the final release binary called <app-name>.apk can be release on the Google Play Store!1$ jarsigner -verbose -sigalg SHA1withRSA -digestalg SHA1 -keystore my-release-key.keystore HelloWorld-release-unsigned.apk alias_name
Further details could be found here.
Developing a User-defined Pipe in Ionic App
Pipe is kind of attribute directive to format our data using ‘|’ pipe character. Generally it is a Angular concept.
- Step 1: Create an Ionic App
Follow the steps described in other Ionic tutorial for developing Ionic Mobile Application and run the new ionic application in browser.
- Step 2: Create an Ionic Pipe
Use the following command to generate a pipe
This will create all necessary files inside folder pipes,1ionic generate pipe EllipsisPipe
The next step is to update the auto generated pipe to actual ellipsis pipe. Therefore, the transform method need to be changed a following:123456789101112131415161718import { Injectable, Pipe } from '@angular/core';/* Generated class for the EllipsisPipe pipe.See https://angular.io/docs/ts/latest/guide/pipes.html for more info onAngular 2 Pipes.*/@Pipe({name: 'ellipsis-pipe'})@Injectable()export class EllipsisPipe {/*Takes a value and makes it lowercase.*/transform(value, args) {value = value + ''; // make sure it's a stringreturn value.toLowerCase();}}
1234567891011transform(value, args) {if (args === undefined) {return value;}value = value + ''; // make sure it's a stringif (value.length > args) {return value.substring(0, args) + '...';} else {return value;}} - Step 3: Add the Pipe to the declaration of the ngModule in app.module.ts file
12345678910111213141516import {EllipsisPipe} from '../pipes/ellipsis-pipe';@NgModule({declarations: [… … … ,EllipsisPipe],imports: [IonicModule.forRoot(MyApp)],bootstrap: [IonicApp],entryComponents: [],providers: [{provide: ErrorHandler, useClass: IonicErrorHandler}]})export class AppModule {} - Step 4: Use Pipe from Front-end
1<p>{{longText | ellipsis-pipe:50 }}</p>
How to Make an HTTP request from an Ionic Application?
As we already have created an Ionic Mobile Application, so continue implementing making HTTP request from same Ionic Application.
Generate a Service Provider
By running the following command from the command line, we can create a new service called ‘FriendService’.
|
1 |
ionic g provider FriendService |
This will create a new service inside the provider folder as following:
This new class FriendService, will have a HTTP service imported and would be declared as @Injectable. Therefore it can be injected in any other directive and component.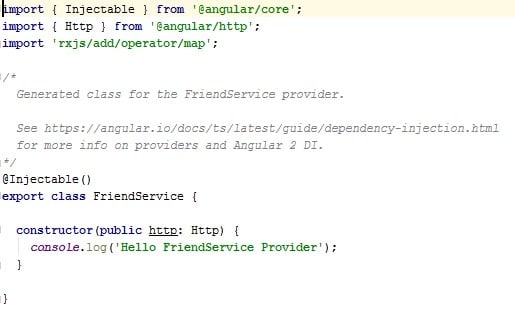
Add the method to run a GET Request from the FriendService class. For this example, we will use a Public API called randomUser API. This API returns profile of dummy person.
|
1 2 3 4 5 6 7 8 9 10 11 |
private url = 'http://api.randomuser.me/?results=10'; // URL to web API getFriends () { return this.http.get(this.url) .map(this.extractData); } private extractData(res: Response) { let body = res.json(); console.log("Friends>>>"+JSON.stringify(body)); return res.json(); } |
Therefore, a HTTP GET request would be triggered while getFriends() function would be called.
Inject the Service Provider to a Component:
Now from component we need to call the getFriends() method of FriendsService Provider.
Firstly, inject the provider in Component. For example, here we have used GridTest Component so we need to inject FriendsService provider into GridTestComponent as following:
|
1 2 3 4 5 6 7 8 9 10 11 12 13 14 15 16 17 18 19 20 21 22 23 24 25 26 27 28 29 30 31 32 33 34 35 36 37 38 39 40 41 42 43 44 45 46 47 48 49 50 51 52 53 54 55 56 57 58 59 60 61 62 63 64 65 66 67 68 69 70 71 72 73 74 75 76 77 78 79 80 81 82 83 |
import { Component } from '@angular/core'; import { NavController, NavParams } from 'ionic-angular'; import {FriendService} from '../../providers/friend-service' /* Generated class for the GridTest page. See http://ionicframework.com/docs/v2/components/#navigation for more info on Ionic pages and navigation. */ @Component({ selector: 'page-grid-test', templateUrl:'grid-test.html', providers: [FriendService] }) export class GridTestPage { friends:Array<any>; selectedValue:string; title:string; friend:any; pass:boolean; na:boolean; loc:boolean; em:boolean;mouseover:boolean; bday:boolean constructor(public navCtrl: NavController, public navParams: NavParams, private _friendService: FriendService) {} ionViewDidLoad() { console.log('ionViewDidLoad GridTestPage'); this.loadfriends(); } loadfriends() { this._friendService.getFriends() .subscribe( data => { this.friends = data.results; console.log(data); }, err => { console.log(err); }, () => console.log('Movie Search Complete') ); } selectPerson(index, label){ if(label === 'name') { this.selectedValue = this.friends[index].name.title + " "+ this.friends[index].name.first+" "+this.friends[index].name.last; this.na= true; this.title= "Hi, My name is"; } else if(label === 'email') { this.selectedValue = this.friends[index].email; this.em= true; this.title= "My email address is"; } else if(label === 'location') { this.selectedValue = this.friends[index].location.street + " "+ this.friends[index].location.city+" "+this.friends[index].location.state; this.loc= true; this.title= "My address is"; } else if(label === 'pass') { this.selectedValue = this.friends[index].login.password; this.pass= true; this.title= "My password is"; } else if(label === 'phone') { this.selectedValue = this.friends[index].phone; this.mouseover= true; this.title= "My phone number is"; } else if(label === 'birthday') { this.selectedValue = this.friends[index].dob; this.bday= true; this.title= "My birthday is"; } } } |
Setup a Test Framework for Ionic application
Ionic 2 app generated still doesn’t have the test framework ready in it. Therefore, all the setup and configuration need to done separately.
We will follow the step by step approach to setup Test Framework for our already developed Ionic Application.
Step 1 : Install Dev Dependencies:
Run the following command to install the development dependencies
|
1 2 3 4 5 6 7 8 9 10 11 12 13 14 15 |
npm install -g karma-cli npm install angular-cli --save-dev npm install codecov --save-dev npm install jasmine-core --save-dev npm install jasmine-spec-reporter --save-dev npm install karma --save-dev npm install karma-chrome-launcher --save-dev npm install karma-jasmine --save-dev npm install karma-mocha-reporter --save-dev npm install karma-remap-istanbul --save-dev npm install ts-node --save-dev npm install tslint --save-dev npm install tslint-eslint-rules --save-dev npm install @types/jasmine --save-dev npm install @types/node --save-dev |
Step 2 : Setup Karma and Modify Karma Config:
Run the following command to setup karma and it will create a karma.conf.js file
|
1 |
karma init karma.conf.js |
- Modify karma.conf.js to reflect the following:
12345678910111213141516171819202122232425262728293031323334353637383940414243// Karma configuration file, see link for more information// https://karma-runner.github.io/0.13/config/configuration-file.htmlmodule.exports = function (config) {config.set({basePath: '',frameworks: ['jasmine', 'angular-cli'],plugins: [require('karma-jasmine'),require('karma-chrome-launcher'),require('karma-remap-istanbul'),require('karma-mocha-reporter'),require('angular-cli/plugins/karma')],files: [{ pattern: './src/test.ts', watched: false }],preprocessors: {'./src/test.ts': ['angular-cli']},mime: {'text/x-typescript': ['ts','tsx']},remapIstanbulReporter: {reports: {html: 'coverage',lcovonly: './coverage/coverage.lcov'}},angularCli: {config: './angular-cli.json',environment: 'dev'},reporters: config.angularCli && config.angularCli.codeCoverage? ['mocha', 'karma-remap-istanbul']: ['mocha'],port: 9876,colors: true,logLevel: config.LOG_INFO,autoWatch: true,browsers: ['Chrome'],singleRun: false});};
Step 3 : Configure Angular CLI and Setup Test Environment:
Create a file in the root folder of your project called angular-cli.json and add the following:
|
1 2 3 4 5 6 7 8 9 10 11 12 13 14 15 16 17 18 19 20 21 22 23 24 25 26 27 28 29 30 31 32 33 34 35 36 37 38 39 40 41 42 43 44 45 46 47 48 49 50 51 52 53 |
{ "project": { "version": "1.0.0-beta.22-1", "name": "ionic2-tdd" }, "apps": [ { "root": "src", "outDir": "dist", "assets": [ "assets" ], "index": "index.html", "main": "main.ts", "test": "test.ts", "tsconfig": "tsconfig.test.json", "prefix": "app", "mobile": false, "styles": [ "styles.css" ], "scripts": [], "environments": { "source": "environments/environment.ts", "dev": "environments/environment.ts", "prod": "environments/environment.prod.ts" } } ], "addons": [], "packages": [], "test": { "karma": { "config": "./karma.conf.js" } }, "defaults": { "styleExt": "css", "prefixInterfaces": false, "inline": { "style": false, "template": false }, "spec": { "class": false, "component": true, "directive": true, "module": false, "pipe": true, "service": true } } } |
- Create a folder inside of src called environments
- Create a file at src/environments/environment.prod.ts and add the following:
123export const environment: any = {production: true,};
- Create a file at src/environment/environment.ts and add the following:
12345678// The file contents for the current environment will overwrite these during build.// The build system defaults to the dev environment which uses `environment.ts`, but if you do// `ng build --env=prod` then `environment.prod.ts` will be used instead.// The list of which env maps to which file can be found in `angular-cli.json`.export const environment: any = {production: false,};
Step 4 : Setup Mocks or Polyfills:
A mock configuration for test.
- Create a file at src/mocks.ts and add the following:
123456789101112131415161718192021222324252627282930313233343536373839404142434445464748495051525354export class ConfigMock {public get(): any {return '';}public getBoolean(): boolean {return true;}public getNumber(): number {return 1;}}export class FormMock {public register(): any {return true;}}export class NavMock {public pop(): any {return new Promise(function(resolve: Function): void {resolve();});}public push(): any {return new Promise(function(resolve: Function): void {resolve();});}public getActive(): any {return {'instance': {'model': 'something',},};}public setRoot(): any {return true;}}export class PlatformMock {public ready(): any {return new Promise((resolve: Function) => {resolve();});}}export class MenuMock {public close(): any {return new Promise((resolve: Function) => {resolve();});}} - Create a file at src/polyfills.ts and add the following class to import:
123456789101112131415161718// This file includes polyfills needed by Angular 2 and is loaded before// the app. You can add your own extra polyfills to this file.import 'core-js/es6/symbol';import 'core-js/es6/object';import 'core-js/es6/function';import 'core-js/es6/parse-int';import 'core-js/es6/parse-float';import 'core-js/es6/number';import 'core-js/es6/math';import 'core-js/es6/string';import 'core-js/es6/date';import 'core-js/es6/array';import 'core-js/es6/regexp';import 'core-js/es6/map';import 'core-js/es6/set';import 'core-js/es6/reflect';import 'core-js/es7/reflect';import 'zone.js/dist/zone';
Step 5 : Setup Test Configuration:
Create a file at src/test.ts and add the following:
|
1 2 3 4 5 6 7 8 9 10 11 12 13 14 15 16 17 18 19 20 21 22 23 24 25 26 27 28 29 30 31 32 33 34 35 36 |
import './polyfills.ts'; import 'zone.js/dist/long-stack-trace-zone'; import 'zone.js/dist/proxy.js'; import 'zone.js/dist/sync-test'; import 'zone.js/dist/jasmine-patch'; import 'zone.js/dist/async-test'; import 'zone.js/dist/fake-async-test'; import { FormsModule, ReactiveFormsModule } from '@angular/forms'; import { getTestBed, TestBed } from '@angular/core/testing'; import { BrowserDynamicTestingModule, platformBrowserDynamicTesting } from '@angular/platform-browser-dynamic/testing'; import { App, Config, Form, IonicModule, Keyboard, DomController, MenuController, NavController, Platform } from 'ionic-angular'; import { ConfigMock } from './mocks'; // Unfortunately there's no typing for the `__karma__` variable. Just declare it as any. declare var __karma__: any; declare var require: any; // Prevent Karma from running prematurely. __karma__.loaded = function (): void { // noop }; // First, initialize the Angular testing environment. getTestBed().initTestEnvironment( BrowserDynamicTestingModule, platformBrowserDynamicTesting(), ); // Then we find all the tests. let context: any = require.context('./', true, /\.spec\.ts/); // And load the modules. context.keys().map(context); // Finally, start Karma to run the tests. __karma__.start(); |
Step 6 : Add src/tsconfig.test.ts file:
|
1 2 3 4 5 6 7 8 9 10 11 12 13 14 15 16 17 18 |
{ "compilerOptions": { "baseUrl": "", "declaration": false, "emitDecoratorMetadata": true, "experimentalDecorators": true, "lib": ["es6", "dom"], "mapRoot": "./", "module": "es6", "moduleResolution": "node", "outDir": "../dist/out-tsc", "sourceMap": true, "target": "es5", "typeRoots": [ "../node_modules/@types" ] } } |
Step 7 : Add Script Command for test to package.json:
|
1 2 3 4 5 6 7 8 9 |
// "test": "ng test" "scripts": { "clean": "ionic-app-scripts clean", "build": "ionic-app-scripts build", "ionic:build": "ionic-app-scripts build", "ionic:serve": "ionic-app-scripts serve", "test": "ng test" }, |
Step 8 : Create Test Spec for AppComponent:
Create a file at src/app/app.spec.ts
|
1 2 3 4 5 6 7 8 9 10 11 12 13 14 15 16 17 18 19 20 21 22 23 24 25 26 27 28 29 30 31 32 33 34 35 36 37 38 39 40 |
import { TestBed, ComponentFixture, async } from '@angular/core/testing'; import { IonicModule } from 'ionic-angular'; import { MyApp } from './app.component'; import { HomePage } from '../pages/home/home'; let comp: MyApp; let fixture: ComponentFixture<MyApp>; describe('Component: Root Component', () => { beforeEach(async(() => { TestBed.configureTestingModule({ declarations: [MyApp], providers: [ ], imports: [ IonicModule.forRoot(MyApp) ] }).compileComponents(); })); beforeEach(() => { fixture = TestBed.createComponent(MyApp); comp = fixture.componentInstance; }); afterEach(() => { fixture.destroy(); comp = null; }); it('is created', () => { expect(fixture).toBeTruthy(); expect(comp).toBeTruthy(); }); it('initialises with a root page of HomePage', () => { expect(comp['rootPage']).toBe(HomePage); }); }); |
beforeEach will run before every test and afterEach will run after every test, so since we have two tests in this file, the process would look something like this:
- Create TestBed testing environment
- Set up references
- Run is createdtest
- Clean up references
- Create TestBed testing environment
- Set up references
- Run initialises with a root page of HomePagetest
- Clean up references
Step 9 : Create Test Spec for Page1:
Create a file at src/pages/pag1/pag1.spec.ts and add the following:
|
1 2 3 4 5 6 7 8 9 10 11 12 13 14 15 16 17 18 19 20 21 22 23 24 25 26 27 28 29 30 31 32 33 34 35 36 37 38 39 40 41 42 43 44 45 46 47 48 49 50 51 52 53 54 55 56 57 58 59 60 61 62 63 64 65 66 67 68 69 70 |
import { TestBed, ComponentFixture, async } from '@angular/core/testing'; import { By } from '@angular/platform-browser'; import { DebugElement } from '@angular/core'; import { IonicModule } from 'ionic-angular'; import { MyApp } from '../../app/app.component'; import { Page1 } from './pages/page1/page1'; let comp: Page1; let fixture: ComponentFixture< Page1>; let de: DebugElement; let el: HTMLElement; describe('Page: Add Todo Page', () => { beforeEach(async(() => { TestBed.configureTestingModule({ declarations: [MyApp, Page1], providers: [ ], imports: [ IonicModule.forRoot(MyApp) ] }).compileComponents(); })); beforeEach(() => { fixture = TestBed.createComponent(Page1); comp = fixture.componentInstance; }); afterEach(() => { fixture.destroy(); comp = null; de = null; el = null; }); it('is created', () => { expect(fixture).toBeTruthy(); expect(comp).toBeTruthy(); }); it('initialises with a title of Add Todo Page', () => { expect(comp['title']).toEqual('Add New Todo'); }); it('can set the title to a supplied value', () => { de = fixture.debugElement.query(By.css('ion-title')); el = de.nativeElement; comp.changeTitle(‘Add Todo'); fixture.detectChanges(); expect(comp['title']).toEqual(‘Add Todo'); expect(el.textContent).toContain(‘Add Todo''); }); }); |
Step 10 : Run Test:
The following command will run the test
|
1 |
npm test |
How to build a Mobile App for different Platform from Ionic App?
We already have created Ionic Application here, so how to build that application for different platforms? Let’s understand it.
Add Plugin to the App:
- Add IOS Platform:
1ionic platform add ios
- Or, Add Android Platform:
1ionic platform add android
Build Project:
Android need to be installed in the machine and ANDROID_HOME System properties variable need to be added.
Set ANDROID_HOME in following ways for different OS:
|
1 2 3 4 5 6 7 8 9 10 11 |
Mac OS X export ANDROID_HOME=/<installation location>/android-sdk-macosx export PATH=${PATH}:$ANDROID_HOME/tools:$ANDROID_HOME/platform-tools Linux export ANDROID_HOME=/<installation location>/android-sdk-linux export PATH=${PATH}:$ANDROID_HOME/tools:$ANDROID_HOME/platform-tools Windows set ANDROID_HOME=C:\<installation location>\android-sdk-windows set PATH=%PATH%;%ANDROID_HOME%\tools;%ANDROID_HOME%\platform-tools Run the following command from the root folder of the app ionic build android |
The project is built in the conference/platforms/android folder
Run The App:
It is possible to run the application on an Android device connected to computer using USB cable:
|
1 |
ionic run android --device |
Ionic also support Android emulator
|
1 |
ionic emulate android |
The course is designed to learn Building Native iOS and Android Applications using AngularJS, Cordova and the Ionic 2/3 Framework. Provide you the opportunity to Build 4 Complete Mobile Apps!
What you will learn in this Ionic Online Course:
- Using the powerful features of Ionic 2, how to Build Native Apps for iOS and Android with Angular.
- To get detailed and in-depth understanding of Ionic 2 to learn more about very advanced features and optimize Mobile Applications
- Testing on real devices for iOS and Android Mobile apps and how to publish those apps to the app stores of Android and Apple.
- View Complete Curriculum
Followings are few highlight about this Ionic 2/Ionic 3 Online Course:
- Best Seller Udemy Online Course
- 10,158++ students enrolled
- 1,795 Review available
- 14.5 Hours on-demand videos
- 26 Articles
- 25 Supplemental Resource
- Access on Mobile and TV
- Certificate of Completion
- Lifetime Access
- 30 days Money back guarantee
- You can get the course at Discounted Price here.
Most attractive feature is 30 days Money Back Guarantee means there is NO RISK. If you didn’t like this ASP.NET Core and Angular 2 Online Course, you can refund your money back within 30 days of purchase.

This was part-2 in Developing Mobile Application using Ionic Framework. Following parts in this series will contain more practical examples. Also, you can go to Part-1 in this Ionic Tutorial Series for Mobile App Development for beginners level concepts. Keep in touch.