


Ionic is basically an open source SDK (Software Development Kit) for developing Hybrid Mobile Applications. It’s a front-end UI framework built on top of AngularJS and Apache Cordova, providing tools and services to build Hybrid Mobile Applications with native look and feel.
Step by Step Ionic Mobile App Development
You can follow the below steps to create your first Ionic Hybrid Mobile Application:
- Install Ionic
- Creating and Running the App
- Updating Metadata
- Installing Cordova Plugin
- Run the Project
Step 1: Install Ionic
Running the following command will install ionic and cordova
|
1 |
npm install -g ionic cordova |
Note: Angular 4 is out now. We can use Angular 4 to develop applications that are cross platform with maximum speed and performance. More to learn Angular 4 here.
Step 2: Creating and Running the App
In order to create an ionic app with ionic 2.0 framework, we have to run the following command on the workspace folder of the project. For this example the name of the project is ‘mytodo’ . –v2 is used for Ionic 2.0 . Ionic 2.0 is based on Angular 2.0.
|
1 |
ionic start mytodo --v2 |
There are currently three different layout are available for ionic 2.0 app. In above command to create an app it is possible to mention the template or layout for the project.
On running the above command we can see the following output on command prompt:
It will also asked for creating a free account:
The following files would be generated inside ‘mytodo’ folder:
Enter in to project root folder using following command
|
1 |
cd mytodo |
Step 3: Updating Metadata
Open www folder and add this security meta tag to index.html file:
|
1 2 |
<meta http-equiv="Content-Security-Policy" content="script-src 'self' 'unsafe-eval' 'unsafe-inline' *; object-src 'self'; style-src 'self' 'unsafe-inline'; media-src *"> |
Step 4: Installing Cordova Plugin
From the project root folder run the following command in order to install the cordova whitelist plugin:
|
1 |
cordova plugin add cordova-plugin-whitelist |

Step 5: Run the Project
Run the project with following command:
|
1 |
ionic serve |
This will open a new browser window and the output would be as following: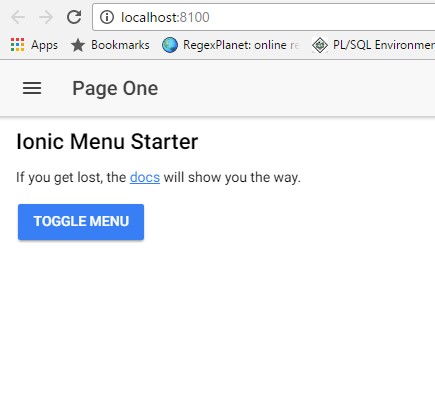
As for example, we have selected the Layout with side menu. On clicking on the ‘TOGGLE MENU’ it will show the following screen: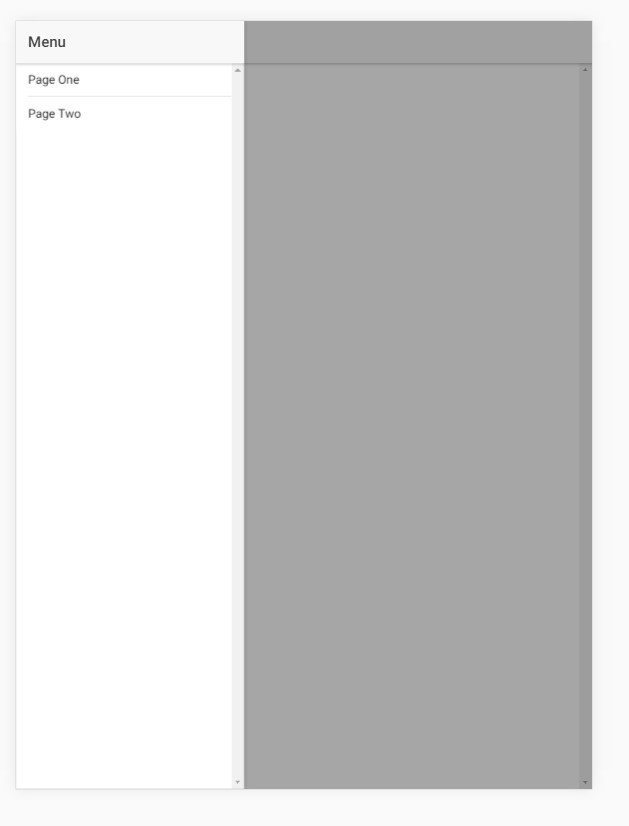
Initially there are two pages and and two menu items. The source code would be generated for corresponding pages as following: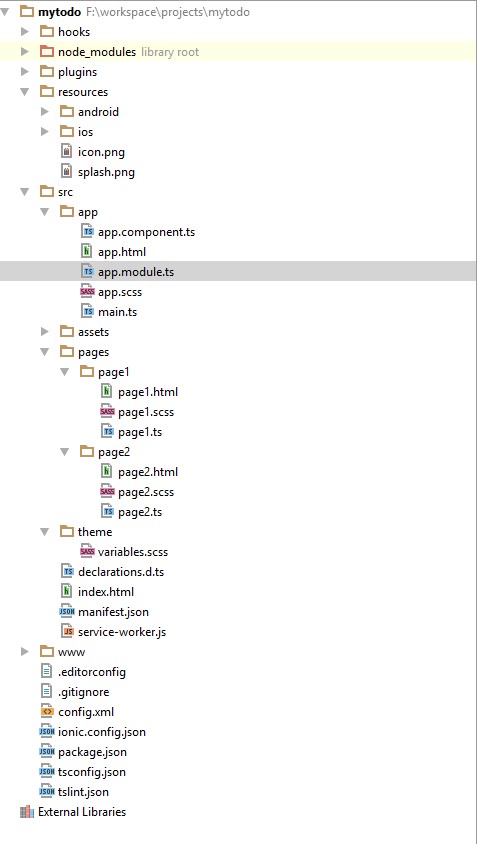
Ionic 2.0 is modular and component based. Therefore, there would a single module called AppModule in src/app/app.module.ts file. In addition, for each page, there would be a corresponding component. For example, in this example, there are two component page1 and pag2. Each of the component folder has its template in .html file, styles in .scss file and component class in .ts file.
|
1 2 3 4 5 6 7 8 9 10 11 12 |
import { Component } from '@angular/core'; import { NavController } from 'ionic-angular'; @Component({ selector: 'page-page1', templateUrl: 'page1.html' }) export class Page1 { constructor(public navCtrl: NavController) { } |
It needs a component as the parent component for the append that will be boostrapped as soon as the module would be bootstrapped. In this example, MyApp Component has been defined in src/app/app.component.ts file as following:
|
1 2 3 4 5 6 7 8 9 10 11 12 13 14 15 16 17 18 19 20 21 22 23 24 25 26 27 28 29 30 31 32 33 34 35 36 37 38 39 |
import { Component, ViewChild } from '@angular/core'; import { Nav, Platform } from 'ionic-angular'; import { StatusBar, Splashscreen } from 'ionic-native'; import { Page1 } from '../pages/page1/page1'; import { Page2 } from '../pages/page2/page2'; @Component({ templateUrl: 'app.html' }) export class MyApp { @ViewChild(Nav) nav: Nav; rootPage: any = Page1; pages: Array<{title: string, component: any}>; constructor(public platform: Platform) { this.initializeApp(); this.pages = [ { title: 'Page One', component: Page1 }, { title: 'Page Two', component: Page2 } ]; } initializeApp() { this.platform.ready().then(() => { StatusBar.styleDefault(); Splashscreen.hide(); }); } openPage(page) { // Reset the content nav to have just this page // we wouldn't want the back button to show in this scenario this.nav.setRoot(page.component); } } |
Finally each component has been declared in App Module as following:
|
1 2 3 4 5 6 7 8 9 10 11 12 13 14 15 16 17 18 19 20 21 22 23 24 |
import { NgModule, ErrorHandler } from '@angular/core'; import { IonicApp, IonicModule, IonicErrorHandler } from 'ionic-angular'; import { MyApp } from './app.component'; import { Page1 } from '../pages/page1/page1'; import { Page2 } from '../pages/page2/page2'; @NgModule({ declarations: [ MyApp, Page1, Page2 ], imports: [ IonicModule.forRoot(MyApp) ], bootstrap: [IonicApp], entryComponents: [ MyApp, Page1, Page2 ], providers: [{provide: ErrorHandler, useClass: IonicErrorHandler}] }) export class AppModule {} |
|
1 |
ionic g page page3 |
The above command will create a new component with name page3 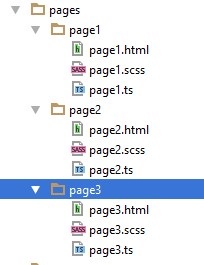
And one more time run the same command:
|
1 |
ionic g page page4 |
Add the pages to the menu item in app.component as following:
|
1 2 3 4 5 6 7 8 9 |
// used for an example of ngFor and navigation this.pages = [ { title: 'Home', component: Page1 }, { title: 'Meeting', component: Page2 }, { title: 'Reminder', component: ReminderPage }, { title: 'My Profile', component: MyProfilePage } ]; } |
Add the new component in the declaration of the AppModule
|
1 2 3 4 5 6 7 8 9 10 11 12 13 14 15 16 17 18 19 20 21 22 23 |
NgModule({ declarations: [ MyApp, Page1, Page2, MyProfilePage, ReminderPage, GridTestPage ], imports: [ IonicModule.forRoot(MyApp) ], bootstrap: [IonicApp], entryComponents: [ MyApp, Page1, Page2, MyProfilePage, ReminderPage, GridTestPage ], providers: [{provide: ErrorHandler, useClass: IonicErrorHandler}] }) |
At this moment the App would look as following: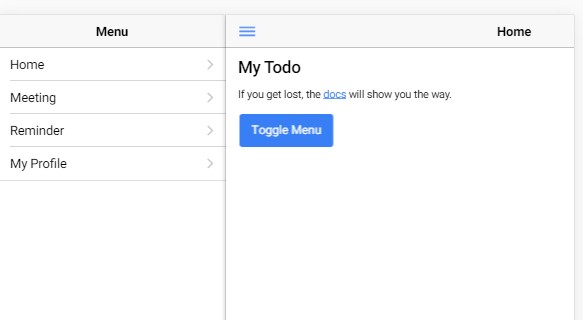
It’s just a basic Ionic Application but you can follow here to find lots of details about Ionic Framework Concepts and getting answer for many related concepts/questions including:
- Navigation in Ionic 2
- How to publish an Ionic Application?
- Developing a user defined pipe in Ionic Application
- How to Cache View?
- Making HTTP Request from an Ionic Application
- and much more…