


Meteor is one of the most popular JavaScript platform for web and mobile application development. Just like Ionic (we covered in previous Mobile App Development Tutorial), we will explore various features of Meteor as a web and mobile app development platform.![]()
Understanding Meteor Web and Mobile App Development
- Web and Mobile App Development using Meteor Platform
- How to Install Meteor?
- Meteor Learning Material
- Creating a Basic Meteor Application
- Using ECMAScript package, ESLint in Coding Meteor Application?
- Collections in Meteor
- How to Read and Write Collection and Connect to MongoDB Client?
- An example of View Rendering in Meteor Web or Mobile Application
- How to make External HTTP request in Meteor?
- How to communicate between nested template?
Web and Mobile App Development with Meteor
Meteor is currently most popular full-stack JavaScript platform for developing modern web as well as mobile applications.
- Its basic advantage is it can be incorporated with all the existing popular front end JavaScript libraries such as Angularjs, Reactjs, Nodejs and so on. In addition, it has its own front end library. Therefore, the whole community of JavaScript could easily enjoy developing Meteor application.
- Another reason for the rapid improvement in the popularity of Meteor is that using meteor, it can be possible to develop an application using only one language.
- This also provides full stack reactivity, allowing the UI to seamlessly reflect the true state of the object with minimal development effort.
- It has MongoDB configuration already available for any application.
How to Install Meteor?
Download Meteor.exe file from the following location and install it
|
1 |
https://www.meteor.com/install |

On OS X or Linux? Install the latest official Meteor release from your terminal:
|
1 |
curl https://install.meteor.com/ | sh |
Meteor Learning Material
- The place to get started with Meteor is the official tutorial.
- Stack Overflow is the best place to ask (and answer!) technical questions. Be sure to add the meteor tag to your question.
- Visit the Meteor discussion forums to announce projects, get help, talk about the community, or discuss changes to core.
- The Meteor docs is the best place to find the core API documentation of the platform.
- Atmosphere is the repository of community packages designed especially for Meteor.
- Awesome Meteor is a community-curated list of packages and resources.


Creating a basic Meteor Application?
We can follow the below steps to create a basic Meteor Application:
- On the workspace open command prompt and run the following command:
1meteor create <projectname>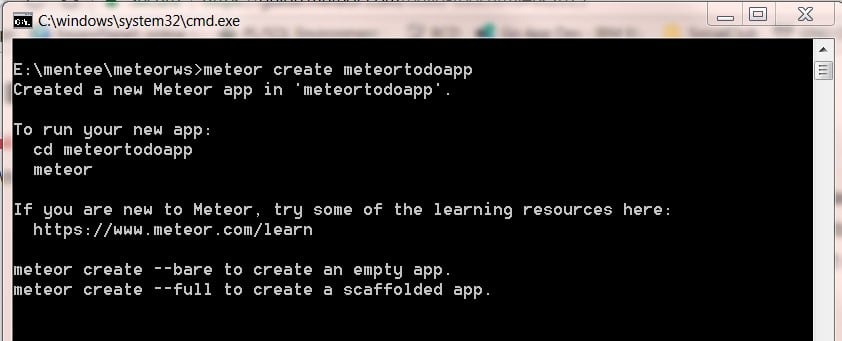
Therefore if you want to create a full scaffolding application use the following command:
1meteor create --full <projectname> - Get inside the project folder, lets the project name is meteortodo
1cd meteortodo
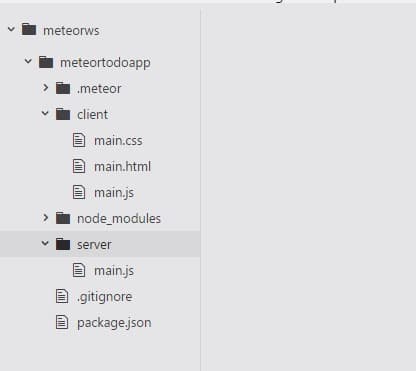
- The folder structure for a minimal application for the project would look like:
For a full scaffolding app, the folder structure would be as following:
- Install all the dependencies by running the following command:
1npm install
- Run the application locally under localhost
1meteor
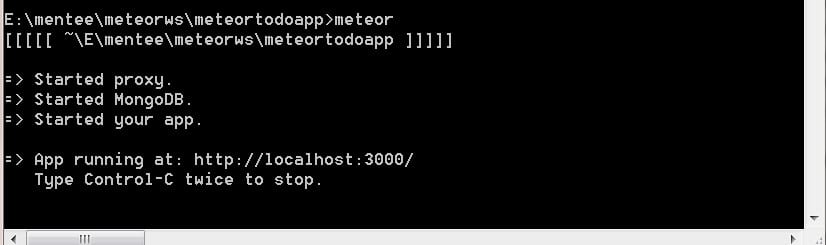
This will start proxy, MongoDb server as well as the application. - From browser if we run ‘localhost:3000’
Using ECMAScript package, ESLint in Coding Meteor Application
While Angularjs and Reactjs is mainly focusing on Typescript, Meteor mainly recommends to use ES2015+ which is the ECMAScript package. ECMAScript is the replacement for CommonJS and AMD, therefore, it makes the application development more smooth and more object-oriented fashion.
However, if developers feel more comfortable with Typescript, ECMAScript can be removed and application can be customized for Typescript. Running following command will remove ECMAScript and install Typescript.
|
1 2 |
meteor remove ecmascript meteor add barbatus:typescript |
It would be also necessary to configure tsconfig.ts file for typescript compiler.
How to use Eslint in coding Meteor Application?
To setup ESLint in the application, it need to install the following npm packages:
|
1 |
meteor npm install --save-dev babel-eslint eslint-config-airbnb eslint-plugin-import eslint-plugin-meteor eslint-plugin-react eslint-plugin-jsx-a11y eslint-import-resolver-meteor eslint |
It is also configurable in the eslintConfig section to the package.json file of the project in order to specify that application to use the Airbnb config, and to enable ESLint-plugin-Meteor.
|
1 2 3 4 5 6 7 8 9 10 11 12 13 14 15 16 17 18 19 20 21 22 23 24 |
{ ... "scripts": { "lint": "eslint .", "pretest": "npm run lint --silent" }, "eslintConfig": { "parser": "babel-eslint", "parserOptions": { "allowImportExportEverywhere": true }, "plugins": [ "meteor" ], "extends": [ "airbnb", "plugin:meteor/recommended" ], "settings": { "import/resolver": "meteor" }, "rules": {} } } |
Finally in order to run theeslint , the following meteor command need to be executed
|
1 |
meteor npm run lint |
- Atom
- Webstorm
Atom:
Install these three following packages and restart Atom:
|
1 2 3 |
apm install language-babel apm install linter apm install linter-eslint |
Webstorm:
WebStorm provides its won set of instructure for using EsLint here. Therefore the steps are
- install the ESLint Node packages
- enable ESLint and click “Apply”

Collections in Meteor
What is Collection in Meteor?
Meteor has its own configuration for MongoDB. Therefore, it usually store the data in the MongoDB and Collections are the store for data in Meteor in the same concept as MongoDB. In MongoDB, a set of related data is referred to as a “collection”. In Meteor the application access MongoDB data through collections. Therefore, collection is the persistence mechanism for the app data.
How many types of MongoDB Collection are available in Meteor?
The collections could be in server, client or even locally.
Server-side collections:
Let’s create a server side collection as following in api/books.js’ file.
|
1 2 3 |
import { Mongo } from 'meteor/mongo'; Books = new Mongo.Collection(books); |
Following action will be taken for the above line
- A collection with name books will be created in MongoDB
- An interface to access the new collection will be initiated
- Following synchronous API can manipulate the collection
123456// This line won't complete until the insert is doneBooks.insert({_id: 'book_1'});// return a bookconst book = Books.findOne({_id: 'book_1'});// no callbacks!console.log(book);
Client-side collections:
Let’s write the same line for client side:
|
1 2 3 |
import { Mongo } from 'meteor/mongo'; Books = new Mongo.Collection(books); |
Following action will be taken for the above line in client side
- There is no direct connection to the MongoDB database from clientside, therefore it is not possible to actually create a new Mongo collection by this line. However, this line will initiate a cache In-memory database with name books in client side.
- Following synchronous API can manipulate the in-memory cache.
123456// This line won't complete until the insert is doneBooks.insert({_id: 'book_1'});// return a bookconst book = Books.findOne({_id: 'book_1'});// no callbacks!console.log(book); - As Meteor uses PUB-SUB module. Therefore, it may be possible that the client contains an up-to-date copy of some subset of the full MongoDB collection. As a result, it need to necessary to write this latest version to actual MongoDb using methods article.
Local collections:
It stays on the client or server, while creating a collection it pass null instead of a name:
|
1 |
SelectedTodos = new Mongo.Collection(null); |
Following action will be taken for the above line
- creates a local collection, which is a Minimongo collection that has no database connection
- The main purpose of this collection is to use the Minimongo library for in-memory storage
What is Schema?
MongoDB is a schema-less database, however, in real world it is necessary while writing to the db the structure of the data is consistent, otherwise it would cost too much in consistencies on rendering the data or even reading them from database. Therefore, schema is used as a known data format to constrain the contents of the collection to conform to that format.
How to define Schema?
Firstly, we have to add a package that could help us to define the schema. Any of the following package can be added to the application in order to create schema for data model.
- aldeed:simple-schema: an expressive, MongoDB based schema
- jagi:astronomy: a full Object Model (OM) layer offering schema definition, server/client side validators, object methods and event handlers
Secondly, we have a Lists ‘Books’. Lets use simple-schema, to create a new instance of the SimpleSchema class and attach it to the Lists object:
|
1 2 3 4 5 6 7 |
Books.schema = new SimpleSchema({ title: {type: String}, description: {type: String, optional: true }, author: {type: String}, rating: {type: Number, defaultValue: 0}, _Id: {type: String, regEx: SimpleSchema.RegEx.Id} }); |
This above lines define a schema with a few simple rules:
- The fields can be defined either required or ooptional.
- It is possible to put default value e.g rating is a number, which on insertion is set to 0 if not specified.
- For more validation rule, it is possible to define the regEx.
Use of Schema for validation
To validate a document against a schema is pretty straightforward.
|
1 2 3 4 5 6 7 8 |
const book = { title: 'Uncle Toms Cabin', author: ‘Harriet Beecher Stowe’, rating: 5, _id: 'book_1' }; Books.schema.validate(book); |
In the above example, as description is optional, it would be validated successfully. However if we perform the following:
|
1 2 3 4 5 6 7 |
const book = { title: 'Uncle Toms Cabin', myfeedback: ‘great’, rating: 5 }; Books.schema.validate(book); |
Here _id is missing and myFeedback is not in schema. Therefore, it would return Validation error. Therefore it is a good practice that every time there is call for any database operation e.g. Lists.insert(), Lists.update(), Lists.upsert(), first the document or modifier will be automatically checked against the schema. In rder to do so, we just have to add the following line:
|
1 |
Books.attachSchema(Books.schema); |
How to Read and Write Collection and Connect to MongoDB Client?
How to Load Data from Collection?
We just need to import the file where books collection has been created.
|
1 2 3 4 5 6 7 8 9 10 11 |
import { Template } from 'meteor/templating'; import { Tasks } from '../api/books.js'; import './body.html'; Template.body.helpers({ getAllBooks() { return Books.find({}); }, }); |
How to Save Data to Collection?
We have start Mongo db. In a new terminal tab, go to the app root directory and execute the following command:
|
1 |
meteor mongo |
In the command prompt we can direct connect to the Collection as following:
|
1 |
db.books.insert({ title: "Alice in the Woderland!", author: "Lewis Carroll", _id:”book_02”, createdAt: new Date() }); |
This will add a book in the books collection.
Client Side of Meteor Mobile App Development
From client side application, we have to save data to a collection in a number of steps as following:
- Create a new template for adding books as following in /pages/books/new_book.html.
123456789101112131415161718192021222324252627282930313233343536373839404142434445464748495051525354555657<template name="new_book"><div class="container"><div class="row"><h2> Add New Book</h2></div><div class="row"><form class="col s12"><div class="row"><div class="input-field col s12"><input id="title" type="text" class="validate" name="title"><label for="title">Title</label></div></div><div class="row"><div class="input-field col s12"><input id="author" type="text" class="validate" name="author"><label for="author">Author</label></div></div><div class="row"><div class="input-field col s12"><textarea id="description" class="materialize-textarea"></textarea><label for="description">Description</label></div></div><div class="row"><label>Published at</label><div class="input-field col s12"><input type="date" class="datepicker" id="picker1"></div></div><div class="row"><div class="input-field col s12"><textarea id="url" class="materialize-textarea"></textarea><label for="url">URL</label></div></div><div class="row"><div class="input-field col s12"><input id="rating" type="text" class="validate" name="rating"><label for="rating">Rating</label></div></div><div class="row"><input type="submit" value="Add New Book" class="waves-effect waves-light btn"></div></form></div></div></template> - Initiate the date picker in the new_book.js file and also add the new book to Books collection.
123456789101112131415161718192021222324252627282930313233343536373839404142import './new_book.html';import {Books } from './../../../api/books/books.js'Template.new_book.onCreated(function () {Materialize.updateTextFields();$('.datepicker').pickadate({selectMonths: true, // Creates a dropdown to control monthselectYears: 15 // Creates a dropdown of 15 years to control year});});Template.new_book.onRendered(function () {});Template.new_book.events({'submit form': function(event) {event.preventDefault();var titleVar = event.target.title.value;var authorVar = event.target.author.value;var descriptionVar = event.target.description.value;var publishedVar = event.target.picker1.value;var urlVar=event.target.url.value;var ratingVar = event.target.rating.value;var _id = 'book_'+titleVar;// Insert a task into the collectionBooks.insert({titleVar,authorVar,descriptionVar,publishedVar,ratingVar,urlVar,_id,createdAt: new Date(), // current time});// Clear formtarget.title.value = '';target.author.value='';target.description.value = '';target.url.value='';target.picker1.value='';target.url.value = '';target.rating.value='';}}); - In order to load the book from the collection, we just need to add the following method on the onrender method and update the template to show the list.
123456Template.body.helpers({getAllBooks() {// Show newest tasks at the topreturn Books.find({}, { sort: { createdAt: -1 } });},}); - In order to update or delete any of the book from the database we have to add the following method.
12345678910Template.books.events({'click .update'() {Books.update(this._id, {$set: { rathing: this.rating },});},'click .delete'() {Books.remove(this._id);},});
An example of View Rendering in Meteor Application
At this moment inside imports/ui folder a number of folder has been generated as follows:
Here, hello and info are two different component those have been defined inside components folder and home page has been defined inside pages/home folder.
Creating Component:
Inside components folder, every new component is created. Each page or component has a HTML template and a corresponding .js file. For example, in hello.html a template with name hello has been defined.
|
1 2 3 4 5 |
<template name="hello"> <h1>Welcome </h1> <button>Click Me</button> <p>You've pressed the button {{counter}} times.</p> </template> |
In hello.js file, hello.html has been imported. On loading the component template, helloOnCreated() method is being called. Therefore, all related initialization task need to be performed inside this folder.
|
1 2 3 4 5 6 7 8 9 10 11 12 13 14 15 16 17 18 19 |
import './hello.html'; Template.hello.onCreated(function helloOnCreated() { // counter starts at 0 this.counter = new ReactiveVar(0); }); Template.hello.helpers({ counter() { return Template.instance().counter.get(); }, }); Template.hello.events({ 'click button'(event, instance) { // increment the counter when button is clicked instance.counter.set(instance.counter.get() + 1); }, }); |
The next important thing is evetry time an event is triggered, Template.hello.events({}) listen for event and execute corresponding action.
Each component has its own instance in order access the object of the class.
Template.hello.helpers() , this helper section controls all the necessary helping method.
Creating Page:
Inside pages folder each page would have its own folder. This structure is not mandatory, however for large scale project this is a suitable code structure. Each page would have a HTMl template file and a corresponding js file.
For example, in home.html:
|
1 2 3 |
<template name="App_home"> {{> hello}} </template> |
Here , hello component has been rendered inside App_hoem template.
And in home.js
|
1 2 3 |
import './home.html'; import '../../components/hello/hello.js'; |
It just need to import the necessary js file for each used component and the template file for corresponding page.
Now if from meteor command line tool we run the following command:
|
1 |
meteor |
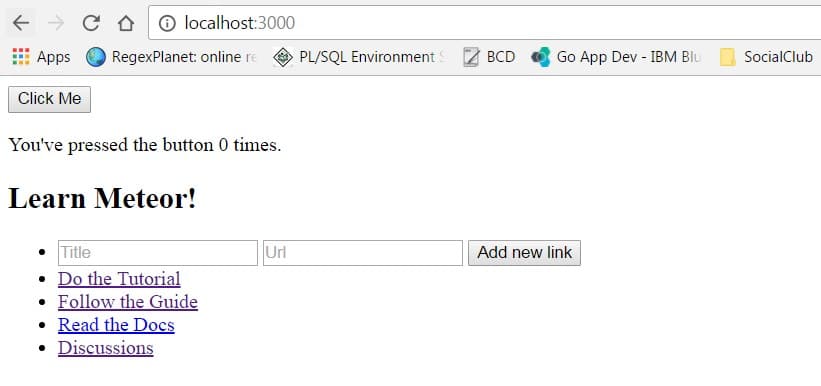
And from browser we run ‘localhost:3000’, we can see the following:
Dynamic Template Render:
The main page of the application is body inside layout:
Inside body.html
|
1 2 3 |
<template name="App_body"> {{> Template.dynamic template=main}} </template> |
Therefore, the main template is changed y any other template dynamically.
Currently the home template has been loaded, however if we want to load the register template.
Add Route:
Therefore we have to add a new route in routes.js in ‘\mylibrary\imports\startup\client\routes.js’ as following:
|
1 2 3 4 5 6 |
FlowRouter.route('/register', { name: 'register', action: function() { BlazeLayout.render("App_body", {content: "register"}); }, }); |
Add Login UI:
- Add account-ui using following command:
1meteor add accounts-ui
- There are a number of functionality for login in order to use password, facebook login twitter login and so one. We have to pick one of the following package and add that to the application.
1234567meteor add accounts-passwordmeteor add accounts-facebookmeteor add accounts-googlemeteor add accounts-githubmeteor add accounts-twittermeteor add accounts-meetupmeteor add accounts-meteor-developer
For example,
It is also possible to add multiple one from the above package. - Adding loginButtons component in any place will render the login windows
123456789101112131415161718<template name="header"><header><nav><div class="nav-wrapper"><a href="#" class="brand-logo">Logo</a>{{#if currentUser}}<p>You're logged in.</p>{{else}}<ul id="nav-mobile" class="right hide-on-med-and-down"><li>{{> loginButtons}}</li><li><a href="">Register</a></li></ul>{{/if}}</div></nav></header></template>
Add Register Template:
We have add the form for register as following in \mylibrary\imports\ui\pages\register\register.html.
|
1 2 3 4 5 6 7 8 9 10 11 12 13 14 15 16 17 18 19 20 21 22 23 24 25 26 27 28 29 30 31 32 33 34 35 36 |
Therefore in order to register a user, we have to define a component Register <template name="register"> <div class="container"> <div class="row"> <form class="col s12"> <div class="row"> <div class="input-field col s6"> <input placeholder="Placeholder" id="first_name" type="text" class="validate" name="first_name"> <label for="first_name">First Name</label> </div> <div class="input-field col s6"> <input id="last_name" type="text" class="validate" name="last_name"> <label for="last_name">Last Name</label> </div> </div> <div class="row"> <div class="input-field col s12"> <input id="password" type="password" class="validate" name="password"> <label for="password">Password</label> </div> </div> <div class="row"> <div class="input-field col s12"> <input id="email" type="email" class="validate" name="email"> <label for="email">Email</label> </div> </div> <div class="row"> <input type="submit" value="Register"> </div> </form> </div> </div> </template> |
And then in register.js the following function need to be added
|
1 2 3 4 5 6 7 8 9 10 11 12 13 14 15 16 17 18 19 20 21 22 23 24 25 26 27 28 29 30 31 32 33 34 35 36 37 38 39 40 41 42 43 44 45 46 47 48 49 50 |
import './register.html'; Template.register.onCreated(function () { }); Template.register.onRendered(function () { }); Template.register.events({ 'submit form': function(event) { event.preventDefault(); var emailVar = event.target.email.value; var passwordVar = event.target.password.value; var firstNameVar = event.target.first_name.value; var lastNameVar = event.target.last_name.value; Accounts.createUser({ email: emailVar, password: passwordVar, firstName:firstNameVar, lastName:lastNameVar }); } }); import './register.html'; Template.register.onCreated(function () { }); Template.register.onRendered(function () { }); Template.register.events({ 'submit form': function(event) { event.preventDefault(); var emailVar = event.target.email.value; var passwordVar = event.target.password.value; var firstNameVar = event.target.first_name.value; var lastNameVar = event.target.last_name.value; Accounts.createUser({ email: emailVar, password: passwordVar, firstName:firstNameVar, lastName:lastNameVar }); } }); |
How to make External HTTP request in Meteor?
For example if we want to get data from the api called http://api.randomuser.me.
- Add HTTP in order to make HTTP call.
1meteor add http - Add Method in server.
We need to add the following method in server/methods file as following:
1234567891011121314151617import { Meteor } from 'meteor/meteor';import { check } from 'meteor/check';import { Links } from './links.js';Meteor.methods({'links.insert'(title, url) {… … …… … ..},'getFriends': function () {console.log('Method.getFriends for', ip);// Construct the API URLvar results = 'http://api.randomuser.me?results=10';// query the APIvar response = HTTP.get(results).data;return response;}}); - Call getFriends method from the cardlist template as following:
1234567891011121314151617181920212223import './cardlist.html'import { Meteor } from 'meteor/meteor';Template.cardlist.onCreated(function helloOnCreated() {this.friends = this.getAllFriends();});Template.cardlist.helpers({getAllFriends() {Meteor.call('getFriends', function (err, res) {// The method call sets the Session variable to the callback valueif (err) {Session.set('error', {error: err});} else {Session.set('friends', res);return res;}});},});Template.cardlist.events({}); - Add cardlist Template as following:
123456<template name="cardlist">{{#each friends}}{{> card friend=friend}}{{/each}}</template>
How to communicate between nested template?
Take a look at the cardlist Template as following:
|
1 2 3 4 5 6 |
<template name="cardlist"> {{#each friends}} {{> card friend=friend}} {{/each}} </template> |
Here cardlist component has rendered card component in a loop and for each item in the loop it pass the friend variable as a parameter to card component/template:
|
1 2 3 4 5 6 7 8 9 |
Inside card component the passed variable can be read as following import "./card.html" Template.card.onCreated(function helloOnCreated() { this.friend=this.data.friend; }); |
As session been added the package so we need to add session to the app using following command:
|
1 |
meteor add session |
This was part-1 in Developing Web and Mobile Application using Meteor Framework. Following parts in this series will contain more practical examples. So, keep in touch.