


Model-View-Controller is a software pattern for achieving isolation between different application components. Its always desirable for software applications (especially web-based applications) that there must be clear separation between business logic and the user interface. We can achieve this requirement by using MVC (Model View Controller) design that makes our application more flexible to change. ASP.NET MVC is a framework based on MVC (Model View Controller) design pattern for building web applications.
You can also find more related implementation details here:
- Take a FREE Online Test on ASP.NET MVC to verify you existing knowledge.
- The Complete ASP.NET MVC 5 Course
- Top New Features of ASP.NET vNext
- Understanding Model First Approach in MVC5 with EF6
- Understanding Application Life Cycle in ASP.NET MVC
- ASP.NET MVC3 Vs MVC4 Vs MVC5
- Pass Data from Controller to View (ViewBag | ViewData | TempData | Model)
- Using Bootstrap3 with ASP.NET MVC5
- Build a Full-Stack Web Application with ASP.NET Core, Entity Framework Core and Angular 2 (Angular 4+)
Microsoft has released the latest version of this framework as MVC5 now, with new features and enhancing existing features as well. For an overview of New Features in ASP.NET MVC5 and a good comparison with earlier versions. please Click Here. Let’s understand a bit about MVC i.e. Model, View and Controller here but in order to get understanding of pre-requisite concepts in more detail, please read through ASP.NET MVC FAQs.
- Model:- a representation of our data structure in a data source e.g. database.
- View:- a user interface for model that is presented to end-user.
- Controller:- Translating input from a user to an action on model and preparing appropriate view in response.
For the purpose of implementation, I am going to use Visual Studio Express 2013 for Web. You can easily download it from Microsoft at following URL.
- Microsoft Visual Studio Express 2013 for Web
Simple Steps for ASP.NET MVC5 Application
- Creating MVC5 project in VS 2013
- Preparing a Model
- Add a Controller
- Add simple View
- Open Visual Studio Express 2013 for Web and create “New Project” as “File -> New Project.
- Choose “ASP.NET Web Application” template as shown in following figure. Name the project as “MyFirstMVC5App”, choose location and press “OK” button.

- In next dialog, choose “MVC” as template and again press “OK” button.

- A new ASP.NET MVC 5 project will be created as follows. You can easily find the “Controllers”, “Models” and “Views” folder in solution explorer.

2. Preparing a Model
- In order to prepare a model, right click on “Models” folder and choose “Add”, then “Class”.
- Name the class as “Employee.cs”.

|
1 2 3 4 5 6 |
public class Employee { public string EmpID { get; set; } public string EmpFirstName { get; set; } public string EmpLastName { get; set; } } |
- As we discussed earlier that “Model” is the representation of data structure in our Data Source, so you can assume this “Employee” class represents an Employee table in our database with columns as “EmpID”, “EmpFirstName”, “EmpLastName” and so on.
Note: In order to keep this ASP.NET MVC5 Tutorial simple and straight forward, I am not going to perform any CRUD operation. We will use this Employees.cs class in later Web Development articles on this blog.
3. Add a Controller
- To add a controller to our project, right click on “Controllers” folder, choose “Add”, then “Controller”.
- From “Add Scaffold” dialog, choose “MVC 5 Controller - Empty” and press “Add” button as follows:


- Name the controller as “EmployeeController” in next dialog and press “Add”. A new controller will be added to “Controllers” folder. Controller code generated will be as follows:
|
1 2 3 4 5 6 7 8 9 10 11 |
namespace MyFirstMVC5App.Controllers { public class EmployeeController : Controller { // GET: /Employee/ public ActionResult Index() { return View(); } } } |
- EmployeeController inheriting from base Controller class has a method named Index(). This Index() method will be the default method called when accessing this controller as (http://localhost:xxxx/Employee/).
- In order to generate HTML response, above Index() method uses a view template i.e. represented in code as “return View();”
- As we create a controller, a new folder will be created under “Views” named as “Employee”.
4. Add a View
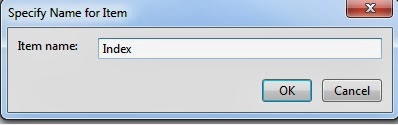
- Finally for adding a view, right click on newly created “Employee” folder under views, choose “Add”, then “MVC 5 View Page (Razor)”. Specify the name for the view “Index” as follows:
- A new file with the name “Index.cshtml” will be added under “Views->Employee” folder. I have added meaningful some text to this page as shown in below figure.


Other Related Articles:

Top 10 Interview Questions and Answers Series:
- Top 10 HTML5 Interview Questions
- Top 10 ASP.NET Interview Questions
- Comprehensive Series of ASP.NET Interview Questions
- Top 10 ASP.NET MVC Interview Questions
- Top 10 ASP.NET Web API Interview Questions
- Top 10 ASP.NET AJAX Interview Questions
- Top 10 WCF Interview Questions
- Comprehensive Series of WCF Interview Questions
thankx alot bro.I had an interview and they asked me almost similar questions. Respect.
Kindly provide the Basic coding to send the value from View to Controller in MVC 3 or 5 using RAZOR
return View(new Employee(){Empid:1, EmpFirstName:”Raj”, EmpLastName:”Kumar”});
Inside View
@model MvcApplication,Models.Employee
@Html.DisplayFor(model => model.EmpId) to display its content
Pingback: Using WCF Data Contract Known Types by Example | WCF Tutorial
Pingback: Top New Features in ASP.NET Web API 2.1 | Web Development Tutorial
Nice article, a good plateform to strart on.
Thanks Shabbi 🙂