


This Web Development Tutorial is last in series of MEAN Stack Interview Questions and Asnwers series covering ExpressJS. Previously, we have covered all other areas including AngularJS, AngularJS 2, NodeJS and MongoDB. You can follow the below link to get updates about all MEAN Stack development articles and tutorials covered so far as well as published in future.
 Express.js is another famous JavaScript Framework that gained a lot more popularity in recent years. We will follow the same strategy to explore all various topics by following Interview Question and Answer pattern.
Express.js Interview Questions PDF version will be available later for download.
Express.js Interview Questions List
- What is Express.js? What are core features of Express framework?
- How to setup an ExpressJS App?
- How to config Angular Front-End in Express Js App?
- Explain Routing in express js?
- Explain Logging in Express Application. Give a practical Example to demonstrate.
- How to config properties in ExpressJS?
- How to allow CORS in Express?
- How to Redirect 404 errors to a page in Express.js?
- Explain Error Handling in Express.js using an example?
- How to implement File uploading and downloading with Express?
- How to enable debugging in express app?
- How to implement JWT authentication in Express app ? Explain with example.
What is Express.js? What are core features of Express framework?
What is Express.js?
Express.js is a light-weight node.js based web application framework. This JavaScript framework provides a number of flexible and useful feature in order to develop mobile as well as web application using NodeJS.
ExpressJS Features:
Following are some of the core features of Express framework −
- Set up middlewares in order to respond to HTTP/RESTful Requests.
- It is possible to defines a routing table in order to perform different HTTP operations.
- Dynamically renders HTML Pages based on passing arguments to templates.
- Provides all the feature provides by core Node.js.
- Express prepare a thin layer, therefore, the performance is adequate.
- Organize the web application into an MVC architecture.
- Manages everything from routes to rendering view and preforming HTTP request.
How to setup an Express.js App?
We can follow the below step by step approach to set up an Application using ExpressJS Framework.
- Create a folder with the same name as Project name.
- Inside the folder create a file called package.json.
123456789101112131415161718192021222324252627282930313233343536373839404142{"name": "npm_smart_grocery","version": "1.0.0","description": "a sample smart grocery manager ","main": "index.js","": {"ajv": "^4.9.0","async": "^1.4.2","body-parser": "^1.13.3","cloudant": "^1.4.0","dotenv": "^2.0.0","express": "^4.13.3","express-session": "^1.11.3","memory-cache": "^0.1.4","moment": "2.10.6","passport": "^0.3.2","path-exists": "^3.0.0","r-script": "0.0.3","rio": "^2.4.1","rox": "0.0.1-13","superagent": "^1.3.0","twitter": "^1.4.0","underscore": "^1.8.3","v8": "^0.1.0","winston": "^2.1.1","winston-daily-rotate-file": "^1.0.1"},"devDependencies": {},"scripts": {"test": "echo \"Error: no test specified\" && exit 1"},"repository": {"type": "git","url": "git+https://github.com/dahlia05/npm_smart_grocery.git"},"author": "dahlia","license": "ISC","bugs": {"url": "https://github.com/dahlia05/npm_smart_grocery/issues"},"homepage": "https://github.com/dahlia05/npm_smart_grocery#readme"} - Open command prompt on the project folder and run following command.
This will install all the libraries defined in package.json inside dependencies{} and the libraries are installed in node_modules folder.1npm install - Create a file called server.js.
123456789101112131415161718192021222324252627282930313233343536373839404142434445464748495051525354"use strict";var express = require('express');var bodyParser = require('body-parser');var session = require('express-session')//var Project = require('./schema').Project;var http = require('http');var https = require('https');/* Initialize express app */var app = express();var host = process.env.APP_HOST || 'localhost';var port = process.env.APP_PORT || '3000';app.use(bodyParser.json());app.use(session({rolling: true,saveUninitialized: true,resave: true,secret: config.SESSION_SECRET,cookie: {maxAge: 36000000,httpOnly: false}}));app.use(express.static(__dirname + '/app'));var index = require('./routes/index');app.use ('/’, index);app.all('*', function(req, res, next) {res.set('Access-Control-Allow-Origin', '*');res.set('Access-Control-Allow-Methods', 'GET, POST, DELETE, PUT');res.set('Access-Control-Allow-Headers', 'X-Requested-With, Content-Type');if ('OPTIONS' == req.method) return res.send(200);next();});/* Define fallback route */app.use(function(req, res, next) {res.status(404).json({errorCode: 404, errorMsg: "route not found"});});/* Define error handler */app.use(logging.errorHandler);/* Start server */app.listen(app.get('port'), function() {logger.info('Express server listening on http://' + app.get('host') + ':' + app.get('port'));}); - Create a folder called ‘routes’ inside the project folder.
- Create a file inside ‘routes’ folder called index.js.
123456789var express = require('express');var router = express.Router();/* GET home page. */router.get('/', function(req, res, next) {res.render('index', { title: 'Express' });});module.exports = router; - Create a folder called ‘app’ inside the project folder and create a file inside ‘app’ folder called ‘index.html’.

- Create a index.html file.
1<h1> Hello World!</h1> - Open command prompt on the project folder and run following command.
The output would be1node server.js
12017-02-01T21:31:15.889Z - info: Express server listening on http://localhost:3000 - Now open a browser with link http://localhost:3000, the output would be:

How to config Angular 2.0 Frontend in Express.js Application?
With the Angular 2.0 the MEAN stack has a huge changes. These are the following steps to create an application using MEAN stack.
- Install Node.js.
- Create an express application using express generator.
- Use the view engine as ejs, therefore, install ejs.
1npm install –save ejs - Set view engine in app.js.
1234// view engine setupapp.set('views', path.join(__dirname, 'views'));app.set('view engine', 'ejs');app.engine('html', require('ejs').renderFile); - Set the static folder.
12// Set Static Folderapp.use(express.static(path.join(__dirname, 'public'))); - Create the config file inside public folder following the Getting started from angular.io.
package.json
tsconfig.json12345678910111213141516171819202122232425262728293031323334353637{"name": "todoapp","version": "1.0.0","scripts": {"start": "tsc && concurrently \"tsc -w\" \"lite-server\" ","lite": "lite-server","postinstall": "typings install","tsc": "tsc","tsc:w": "tsc -w","typings": "typings"},"license": "ISC","dependencies": {"@angular/common": "~2.0.1","@angular/compiler": "~2.0.1","@angular/core": "~2.0.1","@angular/forms": "~2.0.1","@angular/http": "~2.0.1","@angular/platform-browser": "~2.0.1","@angular/platform-browser-dynamic": "~2.0.1","@angular/router": "~3.0.1","@angular/upgrade": "~2.0.1","angular-in-memory-web-api": "~0.1.1","bootstrap": "^3.3.7","core-js": "^2.4.1","reflect-metadata": "^0.1.8","rxjs": "5.0.0-beta.12","systemjs": "0.19.39","zone.js": "^0.6.25"},"devDependencies": {"concurrently": "^3.0.0","lite-server": "^2.2.2","typescript": "^2.0.3","typings":"^1.4.0"}}
typings.json123456789101112{"compilerOptions": {"target": "es5","module": "commonjs","moduleResolution": "node","sourceMap": true,"emitDecoratorMetadata": true,"experimentalDecorators": true,"removeComments": false,"noImplicitAny": false}}
system.config.js1234567{"globalDependencies": {"core-js": "registry:dt/core-js#0.0.0+20160725163759","jasmine": "registry:dt/jasmine#2.2.0+20160621224255","node": "registry:dt/node#6.0.0+20160909174046"}}
12345678910111213141516171819202122232425262728293031323334353637383940414243/*** System configuration for Angular samples* Adjust as necessary for your application needs.*/(function (global) {System.config({paths: {// paths serve as alias'npm:': 'node_modules/'},// map tells the System loader where to look for thingsmap: {// our app is within the app folderapp: 'app',// angular bundles'@angular/core': 'npm:@angular/core/bundles/core.umd.js','@angular/common': 'npm:@angular/common/bundles/common.umd.js','@angular/compiler': 'npm:@angular/compiler/bundles/compiler.umd.js','@angular/platform-browser': 'npm:@angular/platform-browser/bundles/platform-browser.umd.js','@angular/platform-browser-dynamic': 'npm:@angular/platform-browser-dynamic/bundles/platform-browser-dynamic.umd.js','@angular/http': 'npm:@angular/http/bundles/http.umd.js','@angular/router': 'npm:@angular/router/bundles/router.umd.js','@angular/forms': 'npm:@angular/forms/bundles/forms.umd.js',// other libraries'rxjs': 'npm:rxjs','angular-in-memory-web-api': 'npm:angular-in-memory-web-api',},// packages tells the System loader how to load when no filename and/or no extensionpackages: {app: {main: './main.js',defaultExtension: 'js'},rxjs: {defaultExtension: 'js'},'angular-in-memory-web-api': {main: './index.js',defaultExtension: 'js'}}});})(this); - Now run ‘npm install’ command to install all the necessary dependencies.
- Change the ‘views/index.html’ folder with the following code.
123456789101112131415161718192021222324<html><head><title>MyTaskList</title><meta charset="UTF-8"><meta name="viewport" content="width=device-width, initial-scale=1"><link rel="stylesheet" href="bower_components/bootstrap/dist/css/bootstrap.css"><link rel="stylesheet" href="styles.css"><!-- 1. Load libraries --><!-- Polyfill(s) for older browsers --><script src="node_modules/core-js/client/shim.min.js"></script><script src="node_modules/zone.js/dist/zone.js"></script><script src="node_modules/reflect-metadata/Reflect.js"></script><script src="node_modules/systemjs/dist/system.src.js"></script><!-- 2. Configure SystemJS --><script src="systemjs.config.js"></script><script>System.import('app').catch(function(err){ console.error(err); });</script></head><!-- 3. Display the application --><body><my-app>Loading...</my-app></body></html> - Create an app.component.
1234567891011import { Component } from '@angular/core';import {TaskService} from './services/task.service';@Component({moduleId: module.id,selector: 'my-app',templateUrl: 'app.component.html',providers:[TaskService]})export class AppComponent { } - Add the template.
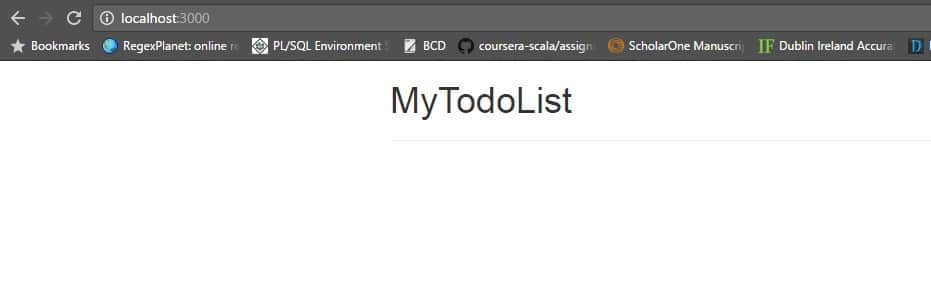
12345<div class="container"><h1>MyTodoList</h1><hr></div> - Create Angular App module in ‘public/app/app.module.ts’.
123456789101112import { NgModule } from '@angular/core';import { BrowserModule } from '@angular/platform-browser';import {HttpModule} from '@angular/http';import {FormsModule} from '@angular/forms';import {AppComponent} from './app.component';@NgModule({imports: [ BrowserModule, HttpModule, FormsModule ],declarations: [AppComponent, TasksComponent],bootstrap: [AppComponent]})export class AppModule { } - Now on the browser it would look like:
- Similarly add other angular module to the angular app.
Explain Routing in Express.js in details?
- Create a file called routes.js containing all the routes of the application.
12345678910111213141516171819202122232425262728293031323334353637383940414243444546/*** Contains all application routes.* @version 1.0*/'use strict';module.exports = {'/member/register': {post: {controller: 'MemberController',method: 'register',public: true}},'/member/login': {post: {controller: 'MemberController',method: 'login',public: true}},'/member/logout': {post: {controller: 'MemberController',method: 'logout',public: true}},'/member/profile/:profileId': {post: {controller: 'MemberController',method: 'saveProfile',public: false},get: {controller: 'MemberController',method: 'getProfile',public: false},delete: {controller: 'MemberController',method: 'deleteProfile',public: false}}}; - Create a file called MemberController.js.
123456789101112131415161718192021222324252627282930313233343536373839404142434445464748495051525354555657585960616263646566676869707172737475767778798081828384858687888990919293949596979899100101102103104105106107108109110111112113114115116117118119120121122123124125126127128129130131132133134135136137138139140141142143144145146147148149150151152153154155156157158159160161162163164165/*** This controller exposes REST actions for managing Games.** @version 1.0*/'use strict';var async = require('async');var MemberService = require('../services/MemberService');var helper = require('../helpers/helper.js');var DBService = require('../services/DBService');var UserAlreadyExistsError = require('../helpers/errors').UserAlreadyExistsError;/*** register a member* @param {Object} req the request* @param {Object} res the response* @param {Function} next the next middleware*/function register(req, res, next) {var user =req.body;async.waterfall([function(cb) {var query = { selector: { email: user.email }, limit: 1};DBService.find(query , cb);},function(data, cb) {if (typeof data.docs!== 'undefined' && data.docs.length > 0)cb(new UserAlreadyExistsError());else{MemberService.registerMember(user,cb);}},function(result) {res.json(helper.buildResponse(result));}], function(err) {if (err) {return next(err);}});}/*** Login.* @param {Object} req the request* @param {Object} res the response* @param {Function} next the next middleware*/function login(req, res, next) {var username = req.body.authInfo.username;var password = req.body.authInfo.password;async.waterfall([function (cb) {MemberService.loginMember(username,password, cb);},function (response, cb) {var query = { selector: { email: username }, limit: 1};DBService.find(query, cb);},function (data, cb) {var user = {"username": username,"isLoggedIn": true};req.session.user = user;res.json({MemberInfo: user});cb();}], function (err) {if (err) {req.session.destroy();return next(err);}});}/*** Logout.* @param {Object} req the request* @param {Object} res the response* @param {Function} next the next middleware*/function logout(req, res, next) {req.session.user = {};res.end();}/*** save profile**/function saveProfile(req, res, next) {var profile = req.body;var profileId = req.params.profileId;var username = req.body.authInfo.username;async.waterfall([function (cb) {MemberService.validateprofile(profile, cb);}, function (profile, cb) {MemberService.saveProfile(profile, profileId, cb);},function(result) {res.json(helper.buildResponse({profileId: profileId,message: result}));}], function (err) {if (err) {req.session.destroy();return next(err);}});}/*** get profile**/function getProfile(req, res, next) {var profileId = req.params.profileId;var username = req.body.authInfo.username;async.waterfall([function (cb) {MemberService.getProfile(profileId, cb);},function(result) {res.json(helper.buildResponse(result));}], function (err) {if (err) {req.session.destroy();return next(err);}});}/*** delete profile**/function deleteProfile(req, res, next) {var profileId = req.params.profileId;async.waterfall([function (cb) {MemberService.deleteProfile(profileId, cb);},function(result) {res.json(helper.buildResponse(result));}], function (err) {if (err) {req.session.destroy();return next(err);}});}module.exports = {login: login,register:register,logout: logout,saveProfile:saveProfile,getProfile:getProfile,deleteProfile:deleteProfile}; - Create a file called MemberService.js and DatabaseService.js would be created.
- In server.js add the following code:
12345678910111213141516171819202122232425262728293031323334353637/* Load all routes */_.each(require("./routes"), function (verbs, url) {_.each(verbs, function (def, verb) {var method = require("./controllers/" + def.controller)[def.method];if (!method) {throw new Error(def.method + " is undefined");}var signature = def.controller + "#" + def.method;var actions = [];actions.push(function(req, res, next) {req.signature = signature;return next();});/* If route is not public, check for user session first */if (!def.public) {actions.push(function(req, res, next) {var user = req.session.user;if (!user || !(user.isLoggedIn)) {return next(new NotAuthenticatedError('You need to login first.'));}next();});}actions.push(function(req, res, next) {try {logger.info('ENTER ' + signature);method(req, res, next);logger.info('EXIT ' + signature);} catch(e) {logging.logError(signature, e);next(e);}});app[verb](url, actions);});}); - Now any of the route defined in routes.js can be accessed.
Explain Logging in Express.js? Give a practical example to demonstrate?
With Express 4.0, the application can be generated using express-generator and it includes morgan as the logger:
- Create express app using express generator.
- The middleware in app.js is already added.
1var logger = require('morgan'); - Create the local middleware.
1var logger = morgan('combined'); - Otherwise, If logging is need to be added to a log file.
Add fs to app.js
Add the file1var fs = require('fs')
Create the middleware1var log_file = fs.createWriteStream(path.join(__dirname, log.log'), {flags: 'a'})
1Var logger = morgan('combined', {stream: log_file}) - Make sure logging will be enabled only in development environment.
1app.use(logger('dev')); - Now if we run from the browser we can see that every request is being logged.
1234567GET /dsfsdf 500 387.461 ms - 1144GET /stylesheets/style.css 304 3.383 ms - -GET / 304 40.564 ms - -GET /stylesheets/style.css 304 1.791 ms - -GET /todos 200 1.397 ms - 51GET /todos/new 304 62.912 ms - -GET /stylesheets/style.css 304 0.397 ms - -
In this project-based course, you will build an entire Bookstore from scratch. You will be able to add, edit and delete books to the backend and customers will be able to browse, add and delete books from their cart as well as purchase it using Paypal.

Take this Course Online Now
How to config properties in Express Application?
In an ExpressJS Application, we can config properties in following two ways:
With Process.ENV?
- Create a file with name ‘.env’ inside the project folder.

- Add all the properties in ‘.env’ file.
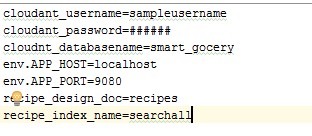
- In server.js any of the properties can be used as:
123var host = process.env.APP_HOSTapp.set('host', host);logger.info('Express server listening on http://' + app.get('host'));
With RequireJs?
- Create a file called ‘config.json’ inside a folder called ‘config’ inside the project folder.
- Add config properties in config.json.
1234{"env":"development","apiurl":"http://localhost:9080/api/v1/"} - Use require to access the config.json file.
1var config = require('./config/config.json');
How to allow CORS in ExpressJS? Explain with an example.
In order to allow CORS in Express.js, add the following code in server.js:
|
1 2 3 4 5 6 7 |
app.all('*', function(req, res, next) { res.set('Access-Control-Allow-Origin', '*'); res.set('Access-Control-Allow-Methods', 'GET, POST, DELETE, PUT'); res.set('Access-Control-Allow-Headers', 'X-Requested-With, Content-Type'); if ('OPTIONS' == req.method) return res.send(200); next(); }); |
How to redirect 404 errors to a page in ExpressJS?
In server.js add the following code to redirect 404 errors back to a page in our ExpressJS App:
|
1 2 3 4 |
/* Define fallback route */ app.use(function(req, res, next) { res.status(404).json({errorCode: 404, errorMsg: "route not found"}); }); |
Explain Error Handling in Express.js using an example?
From Express 4.0 Error handling is much easier. The steps are as following:
- Create an express.js application and as there is no built-in middleware like errorhandler in express 4.0, therefore, the middleware need to be either installed or need to create a custom one.
Create a Middleware:
- Create a middleware as following:
12345678910// error handlerapp.use(function(err, req, res, next) {// set locals, only providing error in developmentres.locals.message = err.message;res.locals.error = req.app.get('env') === 'development' ? err : {};// render the error pageres.status(err.status || 500);res.render('error');});
Install Error Handler Middleware:
- Install errorhandler.
1npm install errorhandler --save - Create a variable.
1var errorhandler = require('errorhandler') - Use the middleware as following:
12345678910111213if (process.env.NODE_ENV === 'development') {// only use in developmentapp.use(errorhandler({log: errorNotification}))}function errorNotification(err, str, req) {var title = 'Error in ' + req.method + ' ' + req.urlnotifier.notify({title: title,message: str})}
How to implement File uploading and downloading with Express?
Below we have explained the process to upload as well as download a file with ExpressJS App.
Upload File in Express.js:
- Install formidable.
1npm install --save formidable - Add the following code in server.js in order to upload a file.
123456789101112131415var formidable = require('formidable');app.post('/', function (req, res){var form = new formidable.IncomingForm();form.parse(req);form.on('fileBegin', function (name, file){file.path = __dirname + '/uploads/' + file.name;});form.on('file', function (name, file){console.log('Uploaded Successfully! ' + file.name);});res.sendFile(__dirname + '/index.html');}); - Update the index.html as following:
123456789101112<!DOCTYPE html><html><head><title>Simple File Upload Example</title></head><body><form action="/" enctype="multipart/form-data" method="post"><input type="file" name="upload" multiple><input type="submit" value="Upload"></form></body></html> - On Browser run ‘http://localhost:3000’.
Download File in Express.js:
- Add the following code in server.js.
1234567var router = express.Router();// ...router.get('/:id/download', function (req, res, next) {var filePath = "/my/file/path/...";var fileName = "samplefile.pdf";res.download(filePath, fileName);});
How to enable debugging in express app?
In different Operating Systems, we have following commands:
On Linux the command would be as follows:
|
1 |
$ DEBUG=express:* node index.js |
On Windows the command would be:
|
1 |
set DEBUG=express:* & node index.js |
From Webstrome IDE
|
1 |
C:\Program Files (x86)\JetBrains\WebStorm 2016.2.4\bin\runnerw.exe" "C:\Program Files\nodejs\node.exe" --debug-brk=61081 --expose_debug_as=v8debug E:\Development\nodejd\library\bin\www |
How to implement JWT authentication in Express app ? Explain with example.
- Create a folder called ‘keys’ inside project folder.
- Install some dependencies as following:
1Npm install jsonwebtoken –save - Add the login router routes/index.js
1234567891011121314151617181920212223242526router.post('/login, function(req, res) {// find the userUser.findOne({name: req.body.username}, function(err, res) {if (err) throw err;if (!res) {res.json({ success: false, message: Login failed.' });} else if (res) {// check if password matchesif (res.password != req.body.password) {res.json({ success: false, message: Login failed. Wrong password.' });} else {var token = jwt.sign(res, app.get('superSecret'), {expiresInMinutes: 1600});// return the information including token as JSONres.json({success: true,message: 'Valid token!',token: token});}} });}); - Use the token in application
12345678910111213141516171819jwt = require("express-jwt");app.use(function(req, res, next) {var token = req.body.token || req.query.token || req.headers['x-access-token'];if (token) {jwt.verify(token, app.get('superSecret'), function(err, decoded) {if (err) {return res.json({ success: false, message: 'Invalid token.' });} else {req.decoded = decoded;next();}});} else {return res.status(403).send({success: false,message: 'No token given.'});}});
Back to top
That is all we have about Express.js Interview Questions and Answers. Next we will come up with more related Web Development related Interview Questions and Answers. You can follow the below given other technical interview questions and answers to improve your technical skills.
Top Technical Interview Questions and Answers Series:
- Top 20 AngularJS Interview Questions
- Advanced Angualar2 Interview Questions
- BackboneJS Interview Questions and Answers
- Top 15 Bootstrap Interview Questions
- Top 10 HTML5 Interview Questions
- Top 10 ASP.NET MVC Interview Questions
- Top 10 ASP.NET Web API Interview Questions
- Top 10 ASP.NET Interview Questions
- Comprehensive Series of ASP.NET Interview Questions
- Top 10 ASP.NET AJAX Interview Questions
- Top 10 WCF Interview Questions
- Comprehensive Series of WCF Interview Questions

 Build an eCommerce App with Angular, Firebase and Bootstrap 4